
Hisense has quietly carved out a respectable niche in the home appliance market, offering dishwashers that balance affordability with solid performance. For homeowners looking to replace an aging unit or outfit a new kitchen without blowing the budget, Hisense models deserve a closer look. They’re not the flashiest option on the showroom floor, but they deliver consistent cleaning and energy efficiency at a price point that won’t make you wince. This guide breaks down what you need to know about Hisense dishwashers, features, installation quirks, troubleshooting, and upkeep, so you can decide if one fits your kitchen and your wallet.
Table of Contents
ToggleKey Takeaways
- Hisense dishwashers balance affordability and solid performance, typically priced between $350 and $650, making them an excellent value option for families and homeowners on a budget.
- A Hisense dishwasher uses only 3.5–4.5 gallons per cycle in Eco mode compared to 27 gallons for hand-washing, saving approximately 6,000 gallons annually for a household running five cycles per week.
- Common performance issues like poor cleaning and water drainage can be resolved quickly by removing and rinsing spray arms, checking the filter, and clearing the drain hose—all DIY fixes that require no special tools.
- Installation of a Hisense dishwasher requires standard plumbing and electrical connections, proper leveling, and a drain loop secured to the cabinet to prevent backflow and leaks.
- Regular monthly maintenance—cleaning the filter, wiping door seals, and inspecting spray arms—paired with quarterly descaling ensures your Hisense dishwasher delivers 8–10 years of reliable service.
What Makes Hisense Dishwashers Stand Out in Today’s Market
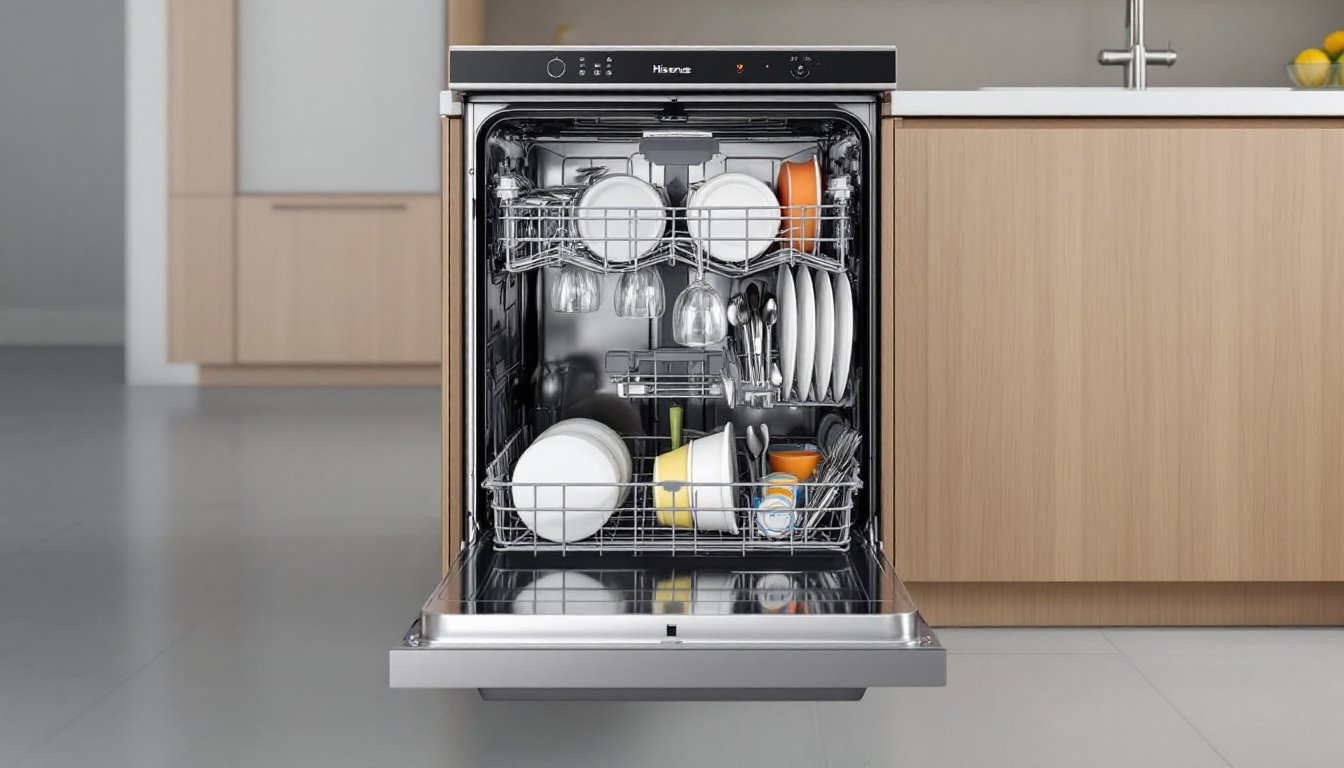
Hisense dishwashers occupy the value segment without feeling cheap. The brand leans on decades of experience in consumer electronics and appliances to deliver units that hit the essentials: multiple wash cycles, decent rack capacity, and energy ratings that won’t spike your utility bill.
What sets them apart is straightforward engineering. No Wi-Fi modules that’ll need firmware updates in three years. No touch-sensitive controls that glitch when your hands are wet. Just mechanical buttons, intuitive cycle selectors, and racks that adjust without requiring a YouTube tutorial. Most models feature stainless steel tubs, which resist stains and odors better than plastic interiors common in budget competitors.
Pricing typically lands between $350 and $650, depending on capacity and features. That’s substantially lower than premium brands while offering comparable cleaning results for everyday dishware. Expect 24-inch standard widths and built-in or portable configurations, with 12- to 14-place setting capacities across the lineup. For kitchens with basic needs, families of four, renters, or flip properties, Hisense delivers without the markup.
The trade-off? Limited service networks in some regions and fewer color options. Most units come in white or stainless steel finishes. If you need panel-ready integration or custom colors, look elsewhere.
Key Features and Technology in Hisense Dishwasher Models
Hisense packs practical features into their dishwashers without the gimmicks. Here’s what you’ll find across most current models:
- Five to seven wash cycles: Normal, Heavy, Eco, Quick, and Rinse are standard. Higher-end units add Sanitize and Glass cycles.
- Delay start timers: Set wash cycles to run during off-peak electricity hours.
- Adjustable upper racks: Accommodate taller items like mixing bowls or stemware.
- Removable cutlery baskets: Some models include a third-level utensil rack instead.
- Child lock functions: Prevent mid-cycle door openings.
Controls are typically rotary dials or push-button arrays. LED indicators show cycle progress. No color touchscreens, which means fewer points of failure and easier repairs down the line.
Performance and Cleaning Capabilities
Cleaning performance hinges on spray arm design and water pressure. Hisense units use dual spray arms, one at the bottom, one mid-level, to ensure coverage across all rack levels. Water jets reach approximately 45–55 dBA during operation, comparable to energy-efficient dishwashers from established brands.
The Sanitize cycle heats water to 150°F or higher, meeting NSF/ANSI Standard 184 for residential dishwashers. This is critical for cutting boards, baby bottles, and anything exposed to raw meat. Heavy cycles extend wash times to 2.5–3 hours but handle baked-on casserole dishes effectively.
Rack design matters. Lower racks feature fold-down tines to fit sheet pans and cutting boards. Upper racks typically adjust via side levers, no need to unload the rack first. The third-level utensil tray, when included, frees up lower rack space but doesn’t fit oversized serving spoons or whisks well.
One quirk: Hisense units don’t dry as aggressively as some competitors. They rely on condensation drying (residual heat evaporates moisture) rather than forced-air systems. Plastic containers may still be damp at cycle end. Crack the door open for 10–15 minutes post-cycle to finish air-drying.
Energy Efficiency and Water Usage
Hisense dishwashers typically earn Energy Star certification, using 3.5–4.5 gallons per cycle on Eco mode. Compare that to hand-washing, which averages 27 gallons for the same load. For a family running five cycles per week, that’s a savings of roughly 6,000 gallons annually.
Electrical draw runs 1,200–1,800 watts during heating phases. Eco cycles drop this by reducing water temperature and extending wash time. If you’re reorganizing your kitchen for efficiency, placing the dishwasher near the hot water heater reduces standby heat loss in supply lines.
Most models use inverter motors, which modulate power draw based on load sensing. Lighter loads consume less energy, though you’ll still want to run full loads to maximize water efficiency.
Installation and Setup: What Homeowners Need to Know
Built-in Hisense dishwashers follow standard 24-inch cabinet cutout dimensions: 24 inches wide, 24 inches deep, and 34–35 inches tall. Verify your cabinet opening with a tape measure, actual vs. nominal dimensions matter. You’ll need access to 120V electrical (hardwired or plug-in, depending on local code), a hot water supply line, and a drain connection.
Tools and materials you’ll need:
- Adjustable wrench
- Screwdriver (Phillips and flathead)
- Teflon tape for water line threads
- Wire nuts (if hardwiring)
- Torpedo level
- Flashlight
Steps:
- Shut off water and power at the source. Flip the breaker and close the hot water shutoff valve under the sink.
- Remove the old unit (if replacing). Disconnect water supply, drain hose, and electrical. Slide out carefully, dishwashers weigh 60–80 pounds.
- Check the drain loop. The drain hose must rise to the underside of the countertop before dropping to the disposal or drain pipe. This prevents backflow. Secure with a hose clamp to the cabinet wall.
- Connect water supply. Use a 3/8-inch compression fitting at the shutoff valve. Wrap threads with Teflon tape, hand-tighten, then snug with a wrench, don’t overtighten or you’ll crack the brass.
- Wire the electrical. Most jurisdictions require hardwiring per NEC standards. Match black to black (hot), white to white (neutral), green or bare to ground. Use wire nuts and wrap with electrical tape. If you’re uncomfortable with electrical work, hire a licensed electrician.
- Slide the unit in. Level front-to-back and side-to-side using the adjustable feet. An unlevel dishwasher won’t drain properly and may leak.
- Secure to countertop. Drive screws through the mounting brackets into the underside of the counter. Use wood screws for wood counters, toggle bolts for stone.
- Test for leaks. Turn on water and power. Run a short rinse cycle and inspect all connections with a flashlight.
Permit note: Some municipalities require a plumbing or electrical permit for dishwasher installation, especially if you’re running new supply lines or circuits. Check with your local building department before starting.
Portable models skip the built-in complexity but require a quick-connect adapter for your kitchen faucet. Expect to wheel the unit to the sink for each use and store it elsewhere afterward, not ideal if space is tight.
Common Issues and Troubleshooting Tips
Dishwasher won’t start: Check the door latch first. Hisense models use a mechanical latch switch that fails if the door doesn’t close flush. Inspect for obstructions in the latch mechanism. If the control panel lights up but nothing happens, the thermal fuse may have blown, a $15 part but requires disassembly to replace.
Poor cleaning results: Nine times out of ten, this is a spray arm blockage. Remove the lower and upper spray arms (they twist off counterclockwise) and rinse debris from the jets. Hard water deposits clog nozzles over time. Use a toothpick to clear stubborn buildup. Also check the filter screen at the tub bottom, pull it out and rinse under hot water weekly.
Water won’t drain: The drain hose may be kinked or the air gap (if installed) could be clogged. Remove the air gap cap on the countertop and clear any gunk. If the drain pump hums but doesn’t expel water, the impeller might be jammed with broken glass or bone fragments. Access the pump from inside the tub (remove the lower spray arm and filter first).
Leaking from the door: Replace the door gasket. Over time, the rubber seal hardens and loses elasticity. Gaskets are model-specific, order using your unit’s serial number. Installation is straightforward: peel out the old gasket and press the new one into the channel. No adhesive needed.
Loud grinding noise: This usually signals a failing wash motor bearing or a foreign object in the chopper blade (located under the filter). Remove the filter assembly and inspect the chopper area with a flashlight. Fruit pits, toothpicks, and twist ties are common culprits.
Error codes: Hisense dishwashers use simple two-digit codes. E1 typically indicates a water inlet issue (check supply valve and inlet screen). E4 points to a heating element fault. E9 signals a leak detection (water in the drip pan). Consult your owner’s manual for the full code list, usually a fold-out chart in the back.
Maintenance Best Practices for Long-Term Performance
Monthly tasks:
- Clean the filter assembly. Pull the cylindrical filter from the tub bottom and rinse under hot water. Use a soft brush to remove grease buildup. A clogged filter forces dirty water back onto dishes.
- Wipe door seals. Crumbs and grease accumulate in the gasket folds. Use a damp cloth with a drop of dish soap.
- Inspect spray arms. Spin them by hand to ensure they rotate freely. If they’re sluggish, mineral deposits may be weighing them down.
Quarterly tasks:
- Run a descaling cycle. Use a commercial dishwasher cleaner or a cup of white vinegar placed upright on the top rack. Run a hot, empty cycle. This dissolves limescale in the heating element and pump.
- Check the drain hose. Look for kinks, cracks, or sagging sections under the sink. Replace if deteriorated.
Annually:
- Inspect electrical connections. If you notice flickering lights or tripped breakers when the dishwasher runs, tighten wire connections or call an electrician.
- Test the door latch and hinges. Tighten screws on the hinge assembly if the door sags.
Water hardness matters. If your municipality has hard water (over 7 grains per gallon), consider a whole-house water softener or use rinse aid religiously. Hard water reduces detergent effectiveness and accelerates mineral buildup in pumps and jets.
Detergent tips: Use powder or gel detergent, not pods, in older Hisense models. Pods sometimes don’t dissolve fully in shorter cycles. Fill the dispenser to the marked line, overdosing leaves residue on glassware.
Safety reminder: Always wear cut-resistant gloves when handling broken glass inside the tub or reaching into the filter area. Sharp edges hide in unexpected places.
With routine upkeep, a Hisense dishwasher should deliver 8–10 years of reliable service. Parts availability is improving as the brand expands in North America, but keep your model and serial number handy for faster ordering.