
Cabinet hinges do more than hold doors in place, they define how smoothly your kitchen functions. A worn hinge creates sag and misalignment, while the right hardware keeps doors closing flush for years. Whether replacing stripped-out European-style hinges or upgrading from exposed barrel hinges to a cleaner concealed look, understanding the types, specs, and installation steps prevents wasted trips to the hardware store. This guide covers the hinge styles most common in modern kitchens, how to match them to your cabinet construction, and the practical steps to install or adjust them without professional help.
Table of Contents
ToggleKey Takeaways
- Hinges for kitchen cabinets come in two main types—concealed (hidden, modern look) and exposed (visible, decorative)—with European hinges dominating frameless designs and butt hinges traditional for face-frame cabinets.
- Match your hinge choice to cabinet construction, door overlay type (full, half, or inset), and opening angle requirements; proper selection prevents misalignment and ensures years of smooth operation.
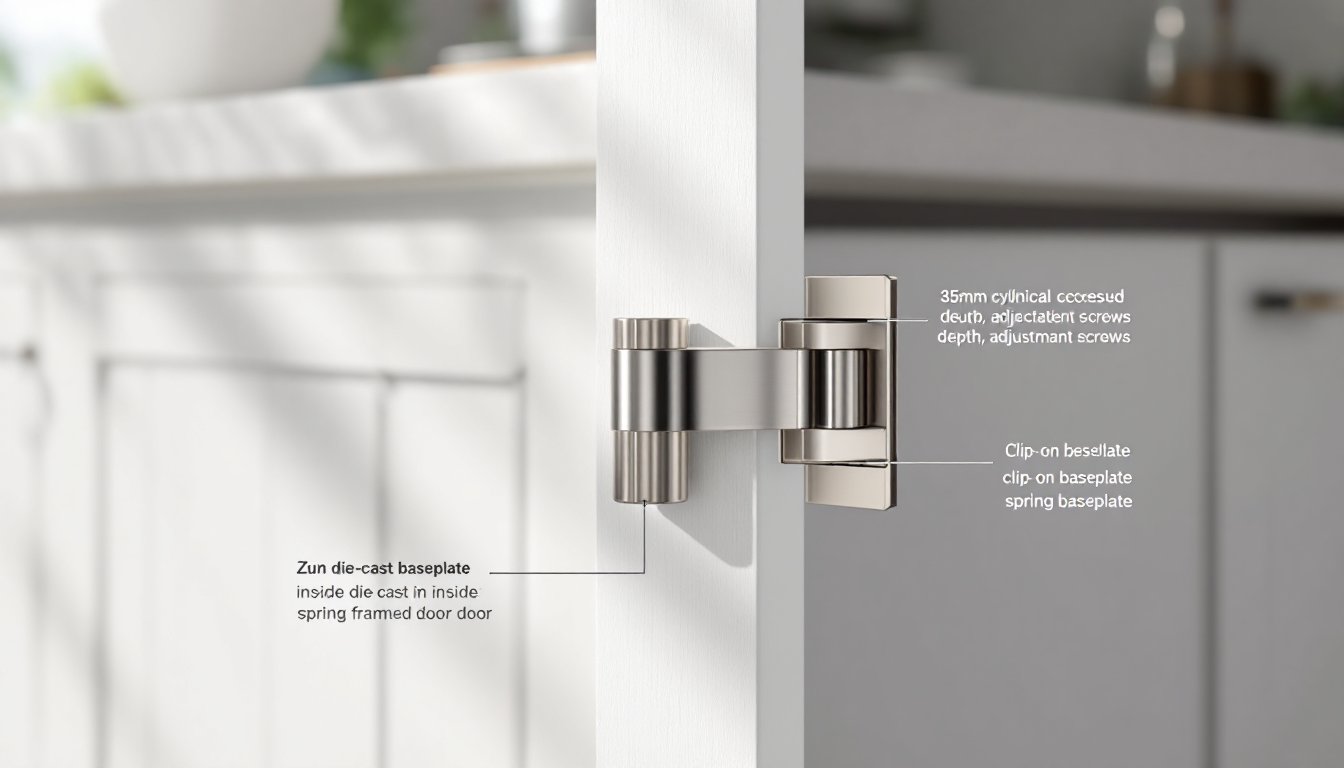
- Installing concealed European hinges requires drilling precise 35mm cup bores 22mm from the door edge and mounting baseplates to the cabinet side, with adjustable screws allowing easy fine-tuning for flush door closure.
- Common hinge problems like sagging doors, soft-close damper failure, and squeaking can be fixed by tightening screws, replacing worn dampers, or applying light machine oil to pivot points.
- Upgrade cabinet hinges when you notice visible rust, frequent misalignment, or desire soft-close convenience (adding dampers costs $40–80 for a ten-door kitchen), or when changing door overlay style or cabinet construction.
Understanding Different Types of Cabinet Hinges
Kitchen cabinet hinges break down into two broad families: concealed (hidden when the door is closed) and exposed (visible on the outside). Within those categories, you’ll find variations in mounting style, opening angle, and adjustment range.
European hinges (also called cup hinges or 32mm hinges) dominate frameless cabinets and many face-frame designs. They mount inside a 35mm bore drilled into the back of the door and clip onto a baseplate screwed to the cabinet side. Most offer three-way adjustment, up/down, left/right, and depth, making them forgiving during installation.
Butt hinges are the traditional mortised type seen on older face-frame cabinets. Two leaves join with a pin: one leaf mortises into the door edge, the other into the cabinet frame. They’re durable but require precise chiseling and offer minimal adjustment once installed.
Wrap-around hinges (or full-wrap hinges) suit face-frame cabinets where the door sits proud of the frame. The hinge wraps around the frame edge, distributing load and hiding screws.
Inset hinges are for doors that sit flush inside the frame opening, a high-end detail that demands tight tolerances. Non-mortise versions simplify installation but remain visible.
Concealed Hinges vs. Exposed Hinges
Concealed hinges hide completely when the door closes, creating a seamless look that’s prized in contemporary and European-style kitchens. The 35mm cup recess and clip-on baseplate make retrofitting straightforward if the existing cabinet uses the same drill pattern. Because they’re spring-loaded, they provide soft-close compatibility (via integrated dampers or add-on modules) and easy door removal, lift the door and press the release clip.
Many homeowners installing frameless IKEA-style cabinets rely on concealed European hinges because the adjustment screws let them dial in alignment without shimming. Expect to pay $3–8 per hinge for mid-grade concealed hardware: soft-close models run $8–15 each.
Exposed hinges remain visible and contribute to the cabinet’s style, think oil-rubbed bronze butt hinges on Shaker doors or decorative strap hinges on rustic farmhouse cabinetry. They’re often easier to install (no large bore required), but once screwed down, adjustment is limited. If the door sags, you’ll need to shim the hinge leaf or redrill pilot holes slightly offset.
Choose exposed when aesthetics call for it or when working with solid-wood inset doors where a mortised butt hinge is traditional. Choose concealed for clean lines, easy adjustment, and modern function.
How to Choose the Right Hinge for Your Cabinet Doors
Match the hinge type to your cabinet construction first. Frameless (Euro-style) boxes almost always use cup hinges. Face-frame cabinets accept cup hinges with a frame-mount baseplate, butt hinges, or wrap-around hinges depending on door overlay.
Overlay describes how much the door covers the cabinet opening. Full overlay doors cover the entire frame or box edge (common in frameless): half overlay leaves part of the frame visible (typical when two doors share a center stile): inset doors sit flush inside the opening. Each requires a specific hinge: full-overlay cup hinges have a 0mm or +3mm arm, half-overlay uses a –3mm or 9mm arm, and inset needs a –15mm or dedicated inset hinge.
Check the opening angle. Standard hinges open 95–110°: if your cabinet sits against a perpendicular wall or appliance, you may need a 165° or 170° wide-angle hinge to access the interior without obstruction.
Door weight and size matter. Doors over 24 inches tall or made from 3/4-inch MDF or solid wood benefit from three hinges instead of two to prevent sag. Heavy solid-wood doors may require heavy-duty butt hinges with ball bearings.
Soft-close is worth the upcharge if you dislike slamming. Integrated soft-close hinges cost more but eliminate separate dampers. Add-on damper clips retrofit onto standard cup hinges for $2–4 per door.
Finally, match the finish. Concealed hinges are typically nickel-plated or zinc die-cast (hidden anyway). Exposed hinges come in satin nickel, oil-rubbed bronze, black, brass, and more, coordinate with handles and pulls for a cohesive look.
Measuring and Installing Kitchen Cabinet Hinges
Precision during layout prevents door misalignment. Measure twice, drill once.
Tools and Materials:
- Drill/driver with bits: 35mm Forstner bit (for cup hinges), 2mm and 3mm twist bits for pilots
- Tape measure and combination square
- Pencil and masking tape (for layout marks)
- Screwdriver (Phillips #2)
- Cabinet hinges (two per door under 24 inches, three for taller doors)
- Mounting screws (usually included: #6 × 5/8-inch Euro screws are common)
- Safety glasses (drilling MDF or particleboard throws fine dust)
Step-by-Step for Concealed European Hinges:
-
Mark the cup location. Standard spacing is 3–4 inches from top and bottom door edges (measure to the cup center). For three-hinge installations, add a center hinge equidistant between top and bottom. Mark 22mm in from the door edge (cup center) and center-punch.
-
Drill the cup bore. Clamp the door face-down on sawhorses. Fit the 35mm Forstner bit in your drill: set depth to 12–13mm (most cups are 11.5mm deep, use a depth stop or wrap tape on the bit as a visual guide). Drill straight down at each mark. Many experienced DIYers follow the techniques shown in guides from established home-improvement publishers to ensure clean bores and proper alignment.
-
Mount the hinge to the door. Press the hinge cup into the bore: the integrated teeth or screws hold it. Drive two #6 screws through the mounting plate into the door edge.
-
Attach the baseplate to the cabinet. For frameless cabinets, position the baseplate 37mm from the cabinet edge (standard for 0mm overlay). For face-frame, the baseplate mounts to the frame: exact position depends on overlay spec. Use a 2mm pilot bit and drive screws into the cabinet side or frame.
-
Clip the door onto the baseplate. Slide the hinge arm onto the baseplate’s mounting lugs and press until it clicks. Some hinges require tightening a cam screw to lock.
-
Adjust. Use the three adjustment screws: front/back (depth), side-to-side, and up/down. Close the door and check gaps: tweak until uniform.
For Butt Hinges:
Mortise the hinge leaves with a sharp chisel so they sit flush. Misaligned mortises cause binding. Drill 1/8-inch pilot holes to prevent splitting: drive screws with a hand screwdriver for final seating to avoid stripping.
Safety: Wear safety glasses when drilling. MDF dust is fine and irritating, use a dust mask if drilling indoors without extraction.
Common Hinge Problems and How to Fix Them
Doors sag or won’t close flush. This usually means hinge screws have loosened or stripped out in particleboard. Remove the door, fill stripped holes with wood glue and toothpicks or 1/8-inch dowel plugs, let cure, then redrill pilots and reinstall. Alternatively, relocate the baseplate slightly and use fresh wood.
Doors hit each other on adjacent cabinets. Overlay is wrong or hinges have drifted. Check that you’re using the correct overlay spec (full vs. half). Adjust the side-to-side screw to shift the door laterally. If two doors share a center stile, both need half-overlay hinges (usually –9mm).
Soft-close damper fails or slams. Integrated dampers wear out after thousands of cycles. Replacement hinges are the fix for integrated types. Clip-on dampers can be swapped individually. Clean any debris from the piston, dust and grease buildup reduce damping.
Squeaking hinge. Apply a drop of light machine oil or silicone spray to the pivot points. Wipe excess to prevent dust attraction. Avoid WD-40 long-term: it evaporates and leaves residue.
Hinge cup pulls out of the door. The 35mm bore may have been drilled too shallow or off-center, or the door material is low-density particleboard. If the cup is loose, remove it, inject wood glue into the bore, reinsert, and let cure overnight. For severe damage, fill the bore with epoxy putty, redrill once cured, or relocate the hinge slightly.
Door won’t stay closed. Spring tension may be insufficient (some European hinges have adjustable spring cams), or the door is slightly warped. Increase spring tension if available, or add a magnetic catch as a backup.
Upgrading Your Kitchen: When to Replace Cabinet Hinges
Visible rust, cracks, or bent leaves signal it’s time. Corroded hinges won’t adjust properly and can stain wood.
Frequent door realignment. If you’re tweaking the same door every few months, the hinge has worn out or the mounting is compromised. Replacing with a fresh set restores function.
Adding soft-close. Retrofitting soft-close hinges is a popular upgrade. Remove old hinges, confirm the existing 35mm bore is clean and centered, and install soft-close cup hinges in the same holes. Total cost runs $40–80 for an average ten-door kitchen (twenty hinges at $2–4 each).
Style refresh. Swapping exposed butt hinges from builder-grade brass to oil-rubbed bronze or matte black updates the look without repainting. This is purely cosmetic but impactful.
Overlay or construction change. If you’re replacing doors (upgrading from partial overlay to full overlay or switching from face-frame to frameless), you’ll need hinges matched to the new spec. Reusing old hinges almost never works because the arm offset and baseplate differ.
Homeowners tackling broader kitchen makeovers often find hinge replacement pairs well with handle swaps and minor cabinet refacing. Resources at sites like Family Handyman offer project ideas that layer small upgrades into a cohesive refresh without full demolition.
When to call a pro: If your cabinets are custom inset with hand-fit doors, or if you’re dealing with antique hinges that require period-correct replacements and mortising, a finish carpenter ensures the result looks factory-original. Structural issues, such as cabinet boxes pulling away from walls, require a contractor to address framing and load, not just hinge swaps.
Conclusion
The right cabinet hinge marries function and finish, adjustable enough to correct minor misalignment, durable enough to handle daily use, and matched to your cabinet’s construction and door style. Whether drilling fresh 35mm cups for concealed European hinges or mortising butt hinges into solid-wood Shaker doors, careful measurement and honest assessment of skill level make the difference between a smooth-operating door and a weekend of frustration. Upgrade when hardware fails, add soft-close for convenience, and don’t hesitate to call in a pro if the project involves structural unknowns or heirloom cabinetry.